iOS瀑布流之横-纵瀑布流

一、开篇

1.瀑布流设计讨论

1.1.应用场景:在我们app开发中,瀑布流一般应用于大数据展示时,比如淘宝搜索页面、蘑菇街app、各大直播app主播列表页面等等。

1.2.设计思路:我们首要考虑UICollectionView,因为UICollectionView特殊性和可复用性。因为瀑布流每个格子item大小不同,需要计算每个item的宽高,就需要自定义UICollectionViewLayout。

2.瀑布流分类

我把瀑布流分为两种:垂直瀑布流、水平瀑布流。

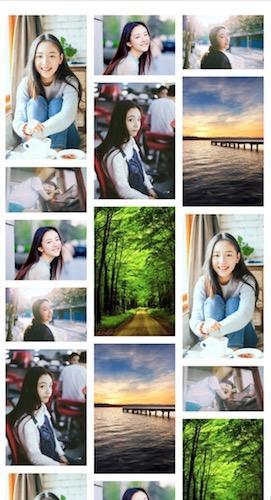
2.1.垂直瀑布流:在我们app上实现的瀑布流一般是垂直瀑布流,也就是列数可设定,item宽度由列数决定,从上往下布局。

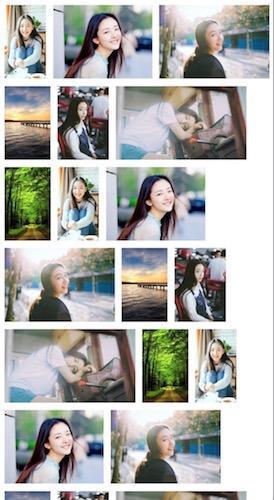
2.2.水平瀑布流:我在搜索网页百度图片时,看到百度图片的布局从而想到的一种布局方式。每行的高度是可设定的,item高度由图片大小决定,比例缩放。

3.瀑布流样式展示

垂直瀑布.png

水平瀑布.png

二、具体实现

1.创建一个UICollectionViewCell,它上面只有一个imageView。

1
2
3
4
5
6
7
8
9
10
// CollectionViewCell.m
- (instancetype)initWithFrame:(CGRect)frame {

if (self = [super initWithFrame:frame]) {
_imageView = [[UIImageView alloc] init];
_imageView.frame = self.bounds;
[self addSubview:_imageView];
}
return self;
}

2.我们需要自定义一个layout,并且暴露一些可设置的属性用来控制瀑布流的对应展示,让瀑布流可用性更强大一些。

2.1 头文件:DYTWaterflowLayout.h

1
2
3
4
5
6
7
8
9
10
11
12
13
14
15
16
17
18
19
20
21
22
23
24
25
26
27
28
29
30
31
32
33
34
35
36
37
38
39
40
41
42
43
44
45
@interface DYTWaterflowLayout : UICollectionViewLayout
/**
* 行高(水平瀑布流时),默认为100
*/
@property (nonatomic, assign) CGFloat rowHeight;
/**
* 单元格宽度(垂直瀑布流时)
*/
@property (nonatomic, assign, readonly) CGFloat itemWidth;
/**
* 列数 : 默认为3
*/
@property (nonatomic, assign) NSInteger numberOfColumns;

/**
* 内边距 : 每一列之间的间距 (top, left, bottom, right)默认为{10, 10, 10, 10};
*/
@property (nonatomic, assign) UIEdgeInsets insets;

/**
* 每一行之间的间距 : 默认为10
*/
@property (nonatomic, assign) CGFloat rowGap;

/**
* 每一列之间的间距 : 默认为10
*/
@property (nonatomic, assign) CGFloat columnGap;

/**
* 高度数组 : 存储所有item的高度
*/
@property (nonatomic, strong) NSArray *itemHeights;

/**
* 宽度数组 : 存储所有item的宽度
*/
@property (nonatomic, strong) NSArray *itemWidths;

/**
* 瀑布流类型 : 分为水平瀑布流 和 垂直瀑布流
*/
@property (nonatomic, assign) DirectionType type;

@end

2.2 .m文件:DYTWaterflowLayout.m属性声明

1
2
3
4
5
6
7
8
9
10
11
12
13
14
15
16
17
@interface DYTWaterflowLayout()

@property (nonatomic, strong) NSMutableArray *itemAttributes; // 存放每个cell的布局属性

// 垂直瀑布流相关属性
@property (nonatomic, strong) NSMutableArray *columnsHeights; // 每一列的高度(count=多少列)
@property (nonatomic, assign) CGFloat maxHeight; // 最长列的高度(最大高度)
@property (nonatomic, assign) CGFloat minHeight; // 最短列的高度(最低高度)
@property (nonatomic, assign) NSInteger minIndex; // 最短列的下标
@property (nonatomic, assign) NSInteger maxIndex; // 最长列的下标

// 水平瀑布流相关属性
@property (nonatomic, strong) NSMutableArray *columnsWidths; // 每一行的宽度(count不确定)
@property (nonatomic, assign) NSInteger tempItemX; // 临时x : 用来计算每个cell的x值
@property (nonatomic, assign) NSInteger maxRowIndex; //最大行

@end

2.3 .m文件:DYTWaterflowLayout.m主要方法实现

1
2
3
4
5
6
7
8
9
10
11
12
13
14
15
16
17
18
19
20
21
22
23
24
25
26
27
28
29
30
31
32
33
34
35
36
37
38
39
40
41
42
43
44
45
46
47
48
49
50
51
52
53
54
55
56
57
58
59
60
61
62
63
64
65
66
67
68
69
70
71
72
73
74
75
76
77
78
79
80
81
82
83
84
85
86
87
88
89
90
91
92
93
94
95
96
97
98
99
100
101
102
103
104
105
106
107
108
109
110
111
112
113
// 
#pragma mark -- 系统内部方法
/**
* 重写父类布局
*/
- (void)prepareLayout {

[super prepareLayout];
// (水平瀑布流时)重置最大行
if ((self.type == HorizontalType)) {
self.maxRowIndex = 0;
}

if (self.type == VerticalType) {
// (垂直瀑布流时)重置每一列的高度
[self.columnsHeights removeAllObjects];
for (NSUInteger i = 0; i < self.numberOfColumns; i++) {
[self.columnsHeights addObject:@(self.insets.top)];
}
}

// 计算所有cell的布局属性
[self.itemAttributes removeAllObjects];
NSUInteger itemCount = [self.collectionView numberOfItemsInSection:0];
self.tempItemX = self.insets.left;
for (NSUInteger i = 0; i < itemCount; ++i) {
NSIndexPath *indexPath = [NSIndexPath indexPathForItem:i inSection:0];
if (self.type == VerticalType) {
[self setVerticalFrame:indexPath];
}else if ((self.type == HorizontalType)){
[self setHorizontalFrame:indexPath];
}
}
}

/**
* 水平瀑布:设置每一个attrs的frame,并加入数组中
*/
- (void)setHorizontalFrame:(NSIndexPath *)indexPath {
UICollectionViewLayoutAttributes *attrs = [UICollectionViewLayoutAttributes layoutAttributesForCellWithIndexPath:indexPath];
CGFloat w = [self.itemWidths[indexPath.item] floatValue];
CGFloat width = w + self.columnGap;
CGFloat h = (self.rowHeight == 0) ? 100 : self.rowHeight;

/**
* 如果当前的x值+当前cell的宽度 超出了 屏幕宽度,那么就要换行了。
* 换行操作 : 最大行+1,tempItemX重置为10(self.insets.left)。
*/
if (self.tempItemX + w > [UIScreen mainScreen].bounds.size.width) {
self.maxRowIndex++;
self.tempItemX = self.insets.left;
}
CGFloat x = self.tempItemX;
CGFloat y = self.insets.top + self.maxRowIndex * (h + self.rowGap);
attrs.frame = CGRectMake(x, y, w, h);

/**
* 注:1.cell的宽度和高度算起来比较简单 : 宽度由外部传进来,高度固定为rowHeight(默认为100)。
* 2.cell的x : 通过tempItemX算好了。
* 3.cell的y : minHeight最短列的高度,也就是最低高度,作为当前cell的起始y,当然要加上行之间的间隙。
*/

NSLog(@"%@",NSStringFromCGRect(attrs.frame));
[self.itemAttributes addObject:attrs];
self.tempItemX += width;
}

/**
* 垂直瀑布:设置每一个attrs的frame,并加入数组中
*/
- (void)setVerticalFrame:(NSIndexPath *)indexPath {
UICollectionViewLayoutAttributes *attrs = [UICollectionViewLayoutAttributes layoutAttributesForCellWithIndexPath:indexPath];

// cell的frame
CGFloat w = self.itemWidth;
CGFloat h = [self.itemHeights[indexPath.item] floatValue];
CGFloat x = self.insets.left + self.minIndex * (w + self.columnGap);
CGFloat y = self.minHeight + self.rowGap;
attrs.frame = CGRectMake(x, y, w, h);

/**
* 注:1.cell的宽度和高度算起来比较简单 : 宽度固定(itemWidth已经算好),高度由外部传进来
* 2.cell的x : minIndex最短列作为当前列。
* 3.cell的y : minHeight最短列的高度,也就是最低高度,作为当前cell的起始y,当然要加上行之间的间隙。
*/

// 更新数组中的最大高度
self.columnsHeights[self.minIndex] = @(CGRectGetMaxY(attrs.frame));
NSLog(@"%@",NSStringFromCGRect(attrs.frame));
[self.itemAttributes addObject:attrs];
}

/**
* 返回collectionView的尺寸
*/
- (CGSize)collectionViewContentSize {
CGFloat height;
if (self.type == HorizontalType) {
CGFloat rowHeight = (self.rowHeight == 0) ? 100 : self.rowHeight;
height = self.insets.top + (self.maxRowIndex+1) * (rowHeight + self.rowGap);
}else {
height = self.maxHeight;
}
return CGSizeMake(self.collectionView.frame.size.width, height);
}

/**
* 所有元素(比如cell、补充控件、装饰控件)的布局属性
*/
- (NSArray *)layoutAttributesForElementsInRect:(CGRect)rect
{
return self.itemAttributes;
}

3.1 直接在控制器里使用

1
2
3
4
5
6
7
8
9
10
// 设置布局
DYTWaterflowLayout *layout = [[DYTWaterflowLayout alloc]init];
layout.type = _type;
// 设置相关属性(不设置的话也行,都有相关默认配置)
layout.numberOfColumns = 3;
layout.columnGap = 10;
layout.rowGap = 10;
layout.insets = UIEdgeInsetsMake(10, 10, 10, 10);
layout.rowHeight = 100;
self.collectionView.collectionViewLayout = self.waterflowLayout = layout;

3.2 (举例)垂直瀑布流时,SDWebImage获取图片block里的具体实现

1
2
3
4
5
6
7
8
9
10
11
12
13
if (weakSelf.heights.count < weakSelf.allImageUrls.count) {
// 根据图片原始比例 计算 当前图片的高度(宽度固定)
CGFloat scale = image.size.height / image.size.width;
CGFloat width = weakSelf.waterflowLayout.itemWidth;
CGFloat height = width * scale;
NSNumber *heightNum = [NSNumber numberWithFloat:height];
[weakSelf.heights addObject:heightNum];
}
if (weakSelf.heights.count == weakSelf.allImageUrls.count) {
// 赋值所有cell的高度数组itemHeights
weakSelf.waterflowLayout.itemHeights = weakSelf.heights;
[weakSelf.collectionView reloadData];
}

3.3 UICollectionViewDataSource中要注意的点

1
2
3
4
5
6
7
8
- (UICollectionViewCell *)collectionView:(UICollectionView *)collectionView cellForItemAtIndexPath:(NSIndexPath *)indexPath {
CollectionViewCell *cell = [collectionView dequeueReusableCellWithReuseIdentifier:reuseIdentifier forIndexPath:indexPath];
cell.imageView.image = self.picImageArr[indexPath.item];
// 注:非常关键的一句,由于cell的复用,imageView的frame可能和cell对不上,需要重新设置。
cell.imageView.frame = cell.bounds;
cell.backgroundColor = [UIColor orangeColor];
return cell;
}

三、总结

1.瀑布流使用场景比较广泛,也是常用的技术之一,我也是又回顾了一遍,并且总结了整体的思路决定分享出来,结尾有demo,童鞋们可以自行下载。另外我参考的资料链接也会贴出,供大家研究比对。
2.水平瀑布流还没达到百度图片搜索的那种效果,右边距离屏幕间隙太大了,所以影响美观。后续会继续研究,期待有所突破。
3.有种情况是后台直接给图片的所有数据给我们,包括url、图片宽高等等,其实这样就是后台已经做好了图片的顺序优化处理。不过我们可以自己研究一下这个排序思路。如何达到右边间隙几乎相同,比如都为10。
4.当然有疑惑的地方可以留言或者直接私信我,我们可以一起讨论。

四、总结最终实现效果:

瀑布流.gif

本文章demo:
瀑布流Demo
参考相关文章:
iOS–瀑布流的实现作者Go_Spec
iOS 瀑布流基本实现作者iOS_成才录

额。。。如果想知道图片里的小姐姐是谁,请直接在文章下面留言。因为我想暂时留点悬念给大家。(皮一下就很开心😄)

坚持原创技术分享,您的支持将鼓励我继续创作!